
9.2 Foundational Concepts
Foundational Concepts of egui
Section titled “Foundational Concepts of egui”To begin developing GUI applications with egui, understanding its fundamental structure and the recommended setup process is important. The eframe crate serves as the primary and officially recommended abstraction layer, simplifying the complexities of cross-platform windowing and rendering for egui applications.
Setting Up a First egui Project with eframe
Section titled “Setting Up a First egui Project with eframe”The most straightforward and officially recommended method for initiating an egui application is by utilising eframe. This framework provides support for both native desktop and web deployments, abstracting away much of the underlying platform-specific complexities.
The process begins with standard Rust project creation:
- Create a new Rust project: Open your terminal or command prompt and execute the command:
cargo new my_egui. This command generates a new directory named my_egui containing a basic Rust project structure, including aCargo.tomlfile and asrc/main.rsfile as is usual.
PS C:\temp> cargo new my_egui Creating binary (application) `my_egui` packagenote: see more `Cargo.toml` keys and their definitions at https://doc.rust-lang.org/cargo/reference/manifest.html- Add
eframeas a dependency: The easiest way to add egui is to use cargo to update your cargo.toml file as follows:
PS C:\temp> cargo add eframeWhich should result in a change similar to the following:
[package]name = "my_egui"version = "0.1.0"edition = "2024"
[dependencies]eframe = "0.32.3"
The following is a minimal, but sophisticated, “Hello World” application structure (src/main.rs): This establishes a basic window and an interactive element, demonstrating the core egui application loop. The #[cfg_attr(not(debug_assertions), windows_subsystem = "windows")] attribute is a common practice to suppress the console window on Windows when building release versions, preventing a command prompt from appearing alongside the GUI.
#![cfg_attr(not(debug_assertions), windows_subsystem = "windows")]// Hide console window on Windows in release
use eframe::{egui, App, Frame};use egui::{CentralPanel, Context, Ui};
/// Defines the application's mutable state./// This struct holds all data that needs to persist and change throughout the application's lifetime.struct MyApp {    label_text: String,    button_clicks: u32,}
/// Implements the Default trait to provide an initial state for MyApp./// This is a convenient way to set up the application's starting values.impl Default for MyApp {    fn default() -> Self {        Self {            label_text: "Hello, egui!".to_owned(),            button_clicks: 0,        }    }}
/// Implements the eframe::App trait, which defines the core logic of the egui application./// The update method is the heart of an immediate mode GUI.
impl App for MyApp {
    /// The update method is called once per frame by eframe to redraw the UI and handle input.    /// ctx: Provides access to the egui context, used for adding widgets and managing UI state.    /// _frame: Provides access to the native window frame, for operations like closing the window.
    fn update(&mut self, ctx: &Context, _frame: &mut Frame) {
        // CentralPanel occupies the main, central area of the window.        // It's a convenient way to place UI elements that fill the available space.        CentralPanel::default().show(ctx, |ui| {            ui.heading("My First egui Application"); // Display a prominent heading            ui.label(&self.label_text); // Display the current text from our application state
            // Create a button. The .clicked() method returns true if the button was pressed.            // In immediate mode, this check happens every frame.            if ui.button("Click Me!").clicked() {                self.button_clicks += 1; // Increment the counter                // Update the label text based on the new counter value.                // This change will be reflected in the next frame's redraw.                self.label_text = format!("Button clicked {} times!", self.button_clicks);            }        });    }}
/// The main function is the entry point of the Rust program./// It sets up and runs the eframe application.fn main() -> eframe::Result<()> {    // Configure native window options, such as initial size and title.    let options = eframe::NativeOptions {        viewport: egui::ViewportBuilder::default().with_inner_size([320.0, 240.0]),        // Set initial window size       ..Default::default() // Use default values for other options    };
    // Run the native eframe application.    // "My egui" is the window title.    // options configures the native window.    // The closure Box::new(|_cc| Ok(Box::new(MyApp::default()))) creates and returns    // an instance of our MyApp struct, which defines the application's UI and logic.
    eframe::run_native(        "My egui", // Window title        options,        Box::new(|_cc| Ok(Box::new(MyApp::default()))),    )}
egui first example.
In this example, the MyApp struct serves as the container for the application’s mutable state, holding values like label_text and button_clicks. The impl App for MyApp block defines the update method, which is invoked by eframe on every frame to handle UI rendering and user input. Within update, CentralPanel::default().show(ctx, |ui| {... }) establishes a central area for UI elements. These elements are then added using the ui object. ui.heading and ui.label are used to display static and dynamic text, respectively, while ui.button("Click Me!").clicked() demonstrates a fundamental interaction: when the button is pressed, the button_clicks counter is incremented, and the label_text is updated accordingly. This change is immediately reflected in the subsequent frame’s redraw.
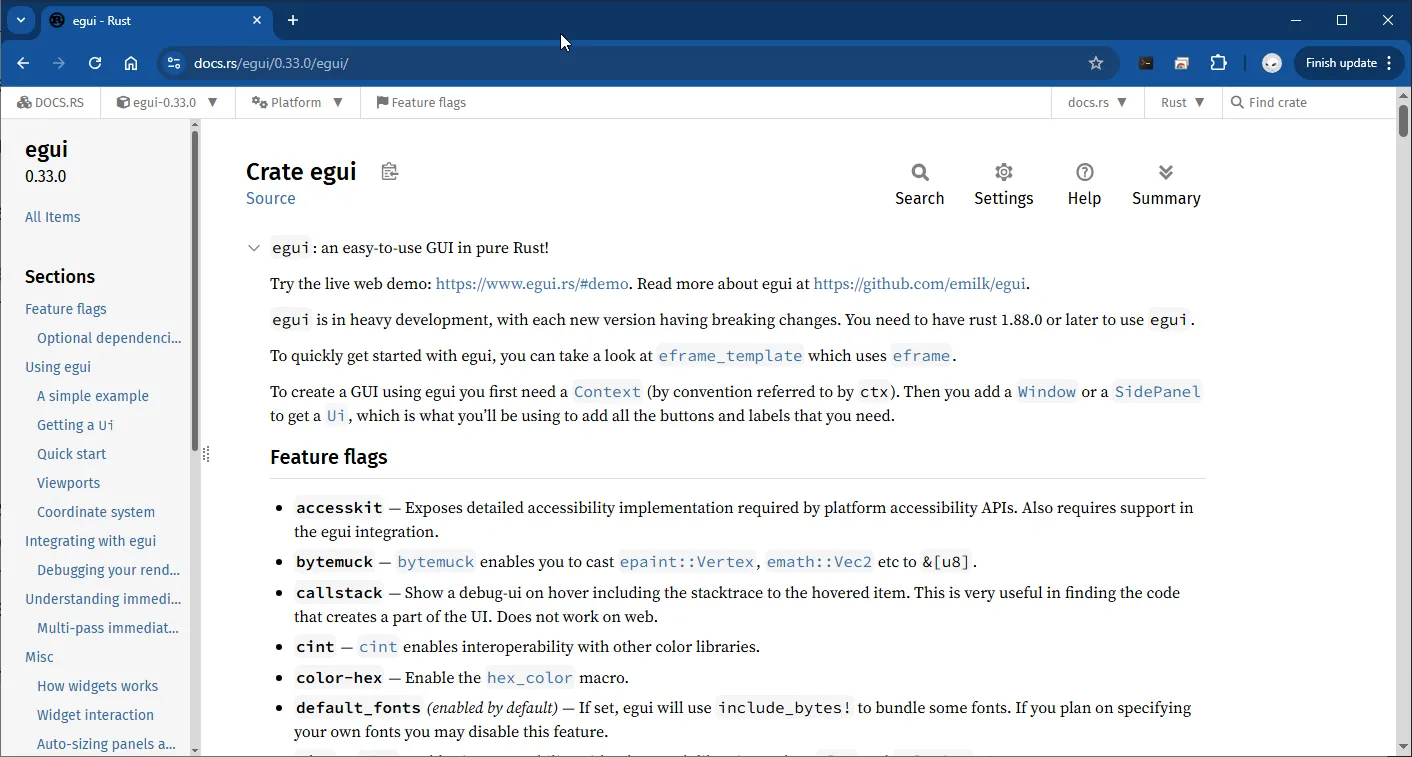
The rust documentation describes all of the functionality available with egui. This documentation will be available during the examination. For example, to learn more about the ui.button use the menu on the left → Crate Items → Structs → Ui → button (https://docs.rs/egui/latest/egui/struct.Ui.html#method.button)
The use of eframe as an abstraction layer is an important aspect of achieving cross-platform compatibility. Instead of egui directly interacting with low-level operating system windowing APIs (such as Win32 on Windows, X11 on Linux, or Cocoa on macOS) or graphics APIs (like DirectX, Vulkan, or Metal), eframe handles this intricate complexity. It achieves this by leveraging platform-specific libraries, such as winit for window management and glow (for OpenGL rendering) or wgpu (for WebGPU rendering) for graphics. This design means that egui itself remains largely agnostic to the specific platform details, as eframe provides a unified, higher-level interface. This separation of concerns is a fundamental principle in modern software engineering, illustrating how complex cross-platform compatibility is achieved. The UI framework (egui) focuses solely on rendering widgets and processing abstract input, while a dedicated backend framework (eframe) translates these abstract operations into platform-specific system calls. This significantly simplifies the developer’s task, allowing them to write egui-specific code without requiring deep knowledge of the underlying operating system or graphics APIs.
🧩 Knowledge Check
Section titled “🧩 Knowledge Check”Match the eframe/egui Application Structure
What is the primary role of the `eframe` crate in a Rust GUI application?
In the immediate mode paradigm used by egui, how frequently is the `update` method typically called?
Rust Closures Revision
Section titled “Rust Closures Revision”In Rust, a closure is an anonymous function you can create in-place. As you have seen C++ lambdas previously, you are already 90% of the way there. They serve the exact same purpose: creating a short, on-the-fly function that can “capture” variables from its surrounding environment. The syntax is very similar.
- C++ Lambda:
[capture_list](parameters) { body } - Rust Closure:
|parameters| { body }
The most significant difference isn’t the syntax, but the capturing mechanism. In C++, you are explicit about *how *you capture variables:
[&]captures by reference.[=]captures by value (a copy).[this]captures thethispointer by value.[&a, b]capturesaby reference andbby value.
In Rust, capturing is implicit and inferred by the compiler. Rust analyzes what you do with the captured variables inside the closure and automatically chooses the most efficient and safe way to borrow or move them. Based on how it captures, the compiler assigns one of three traits to the closure:
Fn(The “Immutable Borrow”): The closure only needs to read captured variables.FnMut(The “Mutable Borrow”): The closure needs to mutate (change) captured variables. This is the most common trait in egui.FnOnce(The “Ownership Move”): The closure takes ownership of a captured variable (i.e., consumes it). As the name implies, it can only be called once.
So, you don’t tell the Rust compiler how to capture (like [&] or [=]). You just use the variables, and the compiler infers whether it needs &T, &mut T, or T, assigning the Fn, FnMut, or FnOnce trait accordingly.
Rust closures are commonly used in egui for capturing variables and simplifying the overall UI layout process. They are also required later when we look at spawning threads in Chapter 11.
Example in egui: Layout and State
Section titled “Example in egui: Layout and State”In egui, you don’t typically use closures for a simple button click (that’s usually just an if statement). Instead, you use closures to define layout and pass in the app’s state. The most common pattern is passing a closure to a layout function like egui::CentralPanel::show or ui.horizontal. This closure captures your application’s state (self) so it can read and modify it.
Imagine you have a simple egui app with some state:
// This is the main state for our applicationstruct MyApp {    name: String,    counter: i32,}
// This is just a snippet from the main 'update' method// where the UI is drawn every frame.fn update(&mut self, ctx: &egui::Context, _frame: &mut eframe::Frame) {
    // egui::CentralPanel::show takes two arguments:    // 1. The context (ctx)    // 2. A closure!    egui::CentralPanel::default().show(ctx, |ui| {
        // This is the body of our closure.        // 'ui' is the parameter (its type is &mut egui::Ui)
        // --- 1. Capturing `&mut self` implicitly ---        // We need to modify self.counter, so the closure        // captures `self` as a mutable borrow (&mut self).        // This makes the closure `FnMut`.
        ui.heading("A Simple egui App");
        ui.label(format!("Counter: {}", self.counter));        if ui.button("Increment").clicked() {            self.counter += 1; // Needs &mut self        }
        // --- 2. A nested closure ---        // ui.horizontal also takes a closure!        ui.horizontal(|ui_inner| {            // This closure ALSO captures `&mut self`            ui_inner.label("Your name: ");            ui_inner.text_edit_singleline(&mut self.name); // Needs &mut self        });    });}
One point of confusion is that ui_inner (or ui in the outer closure) is not a special keyword. It is a parameter name that I chose for the closure. It could have been called derek. So:
- We call
ui.horizontal(...). - We pass it a closure:
|ui_inner| { ... }. - The
horizontalfunction executes. - Inside
horizontal, it creates a new&mut egui::Ui(let’s call ithorizontal_ui). This newUiobject is configured to make widgets line up side-by-side. - The
horizontalfunction then calls our closure and passes itshorizontal_uias the first and only argument. - Our closure receives that argument and names it
ui_inner. - We can then call methods on
ui_inner(likeui_inner.label(...)) to add widgets to that special horizontal layout.
So, ui_inner is just the name we gave to the &mut egui::Ui that ui.horizontal gave back to us.
🧩 Knowledge Check
Section titled “🧩 Knowledge Check”Using Closures for Layout in egui
How does Rust handle variable capturing for closures compared to C++ lambdas?
If a closure in egui modifies a variable belonging to the application state (e.g., `self.counter += 1`), which trait does the Rust compiler assign to it?
Working with Standard Widgets
Section titled “Working with Standard Widgets”A Simple Counter Application

Section titled “A Simple Counter Application”Before diving into custom graphics with the Painter API, it’s essential to master the standard widgets that form the backbone of most user interfaces. egui provides a rich set of built-in components like labels, buttons, text inputs, sliders, and checkboxes. This example demonstrates how to wire up these widgets to a shared application state to create a simple, interactive counter.
Key Concepts Introduced in this Example:
- Widget Interaction: Using buttons to modify application state.
- Displaying State: Using labels to display data from the application state.
- Two-Way Data Binding: Using a slider that both reads from and writes to the application state.
- Layouts: Using
ui.horizontalto arrange widgets.
The Code \
This is Cargo.toml:
[package]name = "egui"version = "0.1.0"edition = "2024"
[dependencies]eframe = "0.32.3"
And main.rs:
#![cfg_attr(not(debug_assertions), windows_subsystem = "windows")]// This attribute hides the console window on Windows when running in *release mode*.// It keeps the app looking like a normal desktop GUI app rather than a console program.
use eframe::egui;// Import the main GUI library (egui) through the eframe framework.// eframe provides an easy way to build native desktop apps using egui for rendering.
// Define the application structurestruct CounterApp {    count: i32, // This variable stores the current counter value.}
// Provide a default value for CounterApp.impl Default for CounterApp {    fn default() -> Self {        Self { count: 0 } // Start the counter at 0 when the app launches.    }}
// Implement the eframe::App trait, which defines how the app behaves each frame.impl eframe::App for CounterApp {    // The update() function is called on every frame to redraw the user interface.    fn update(&mut self, ctx: &egui::Context, _frame: &mut eframe::Frame) {        // The CentralPanel is a main area that automatically expands to fill the window.        egui::CentralPanel::default().show(ctx, |ui| {            // Add a title at the top            ui.heading("EEN1097 Simple Counter App");            ui.separator(); // Draws a horizontal line for visual separation.
            // Set up a layout so that all widgets below are centred vertically.            ui.with_layout(egui::Layout::top_down(egui::Align::Center), |ui| {                ui.add_space(20.0); // Add vertical spacing before the counter.
                // Display the current counter value using a large font size.                ui.label(egui::RichText::new(self.count.to_string()).size(40.0));                ui.add_space(10.0); // Add some space before the buttons.
                // Create a horizontal row for the two buttons.                ui.horizontal(|ui| {                    // "Decrease" button                    if ui.button("Decrease").clicked() {                        self.count -= 1; // Reduce count by 1 when clicked.                    }                    // "Increase" button                    if ui.button("Increase").clicked() {                        self.count += 1; // Increase count by 1 when clicked.                    }                });                ui.add_space(10.0); // Add spacing before the slider.                // Add a slider to adjust the count within a fixed range (0 to 100).                // The .text("Count") label appears beside the slider.                ui.add(egui::Slider::new(&mut self.count, 0..=100).text("Count"));            });        });    }}
// Entry point of the applicationfn main() -> eframe::Result<()> {    // Define options for the native window, such as size and style.    let options = eframe::NativeOptions {        viewport: egui::ViewportBuilder::default()            .with_inner_size([300.0, 200.0]), // Set initial window size.        ..Default::default()    };
    // Launch the native app.    // Arguments:    //   - "Counter App": the window title.    //   - `options`: window configuration defined above.    //   - A closure that creates and returns an instance of `CounterApp`.    eframe::run_native(        "Counter App",        options,        Box::new(|_cc| Ok(Box::new(CounterApp::default()))),    )}
Explanation \
- Application State: The
CounterAppstruct holds a single integer calledcount. This field is the “single source of truth” for our application. All widgets will read from or write to this value. - Displaying Data: We use
ui.label()to display the current count. Theformat!macro is used to convert thei32into aStringthat the label can show.egui::RichTextis used to easily style the text with a larger font size. - Responding to Button Clicks: The pattern “
if ui.button("...").clicked()“ is the core of event handling inegui. The.clicked()method returnstruefor the single frame in which the button is clicked, allowing us to run code in response — in this case, modifyingself.count. Theui.horizontalblock ensures the buttons are placed side-by-side. - Two-Way Data Binding with a Slider: The
egui::Slideris a powerful example ofegui’s immediate mode data handling. By passing a mutable reference (&mut self.count), we allow the slider to both read the current value ofcountto set its position and write a new value back tocountwhen the user interacts with it. This creates a seamless two-way binding with a single line of code.
🧩 Knowledge Check
Section titled “🧩 Knowledge Check”Match the Counter App Concepts
Interactive Widgets in egui
How does the `egui::Slider` implement two-way data binding in the Counter App example?
© 2026 Derek Molloy, Dublin City University. All rights reserved.